How to Train LaneKerbNet
Contents
Use tensorflow to implement a Deep Neural Network for real time lane and kerb detection mainly based on the CVPR 2015 paper Fully Convolutional Networks for Semantic Segmentation and IEEE 2018 IV conference paper Towards End-to-End Lane Detection: an Instance Segmentation Approach. You can refer to their paper for details. This model consists of a encoder-decoder stage, class semantic segmentation stage and instance semantic segmentation using discriminative loss function for real time lane and kerb detection task.
The main network architecture is as follows:
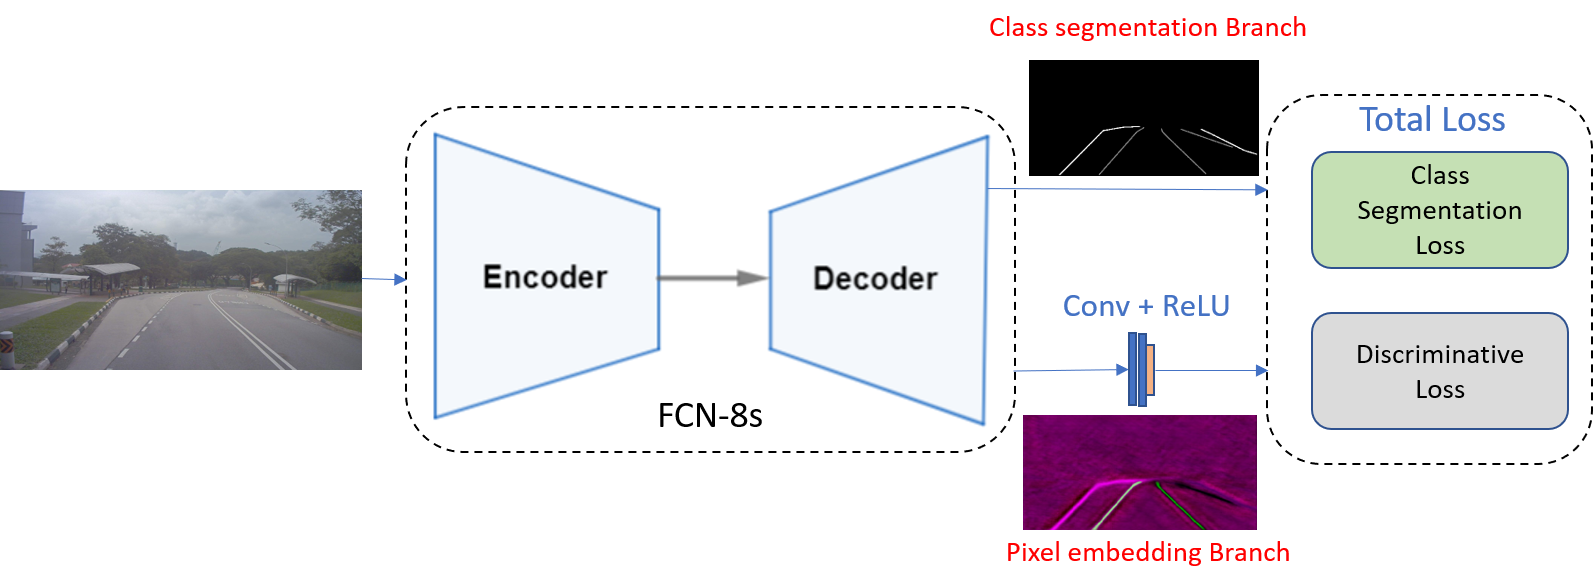
Fig. 5 Network Architecture.
1. Installation
This software has only been tested on ubuntu 16.04(x64), python3.5, cuda-9.0, cudnn-7.0 with a GTX-1080 GPU. To install this software you need tensorflow 1.10.0 and other version of tensorflow has not been tested but I think it will be able to work properly in tensorflow above version 1.10. Other required package you may install them by
pip3 install -r requirements.txt
2. Test model
In this repo I uploaded a model trained on rosbag sequence 01-10 data provided by STK. The deep neural network inference part can achieve around a 30+fps.
The trained lanenet model weights files are stored folder model/tusimple_lanenet.
You can test a single image on the trained model as follows:
python3 tools/test_lanenet.py --is_batch False --batch_size 1 --weights_path path/to/your/model_weights_file --image_path data/tusimple_test_image/0.jpg
For example on my computer
python3 tools/test_lanenet.py --is_batch False --batch_size 1 --weights_path model/tusimple_lanenet/tusimple_lanenet_vgg_2019-07-29-11-33-18.ckpt-38000 --image_path data/tusimple_test_image/3.jpg
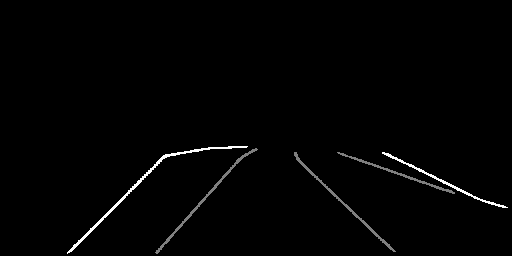
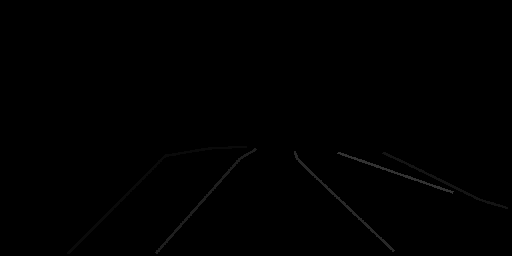
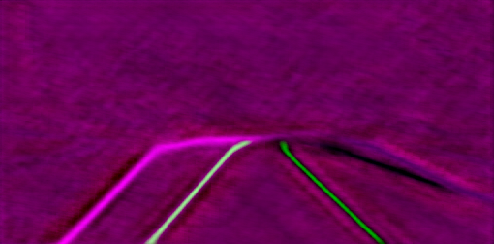
The results are as follows:
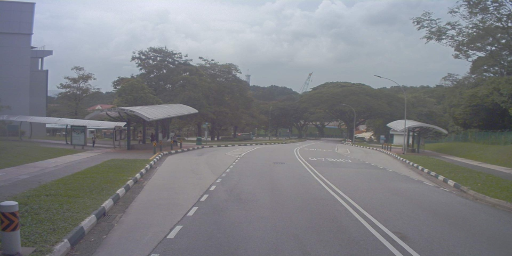
Test Input Image
Test Lane and Kerb Mask Image
Test Lane and Kerb Segmentation Image
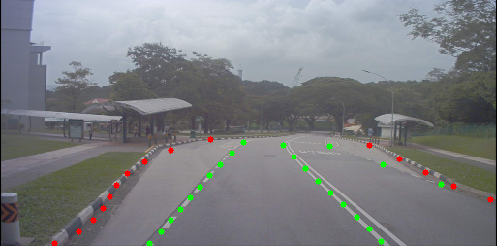
Test Lane and Kerb Instance Segmentation Image
Test Lane and Kerb Instance Embedding Image
If you want to test the model on a whole dataset you may call
python3 tools/test_lanenet.py --is_batch True --batch_size 2 --save_dir data/tusimple_test_image/ret --weights_path path/to/your/model_weights_file --image_path data/tusimple_test_image/
For example on my computer
python3 tools/test_lanenet.py --is_batch True --batch_size 2 --save_dir data/tusimple_test_image/ret --weights_path model/tusimple_lanenet/tusimple_lanenet_vgg_2019-07-29-11-33-18.ckpt-38000 --image_path data/tusimple_test_image/
If you set the save_dir argument the result will be saved in that folder or the result will not be saved but be displayed during the inference process holding on 3 seconds per image. I test the model on the collected rosbag data and make it a video. You may catch a glimpse of it bellow.
Test dataset gif

3. Train your own model
3.1 Data Preparation
Firstly you need to organize your training data refer to the data/training_data_example folder structure. And you need to generate a train.txt and a val.txt using bdd-data to record the data used for training the model.
The training samples are consist of three components: the original image, a class segmentation label file and a instance segmentation label file. The class segmentation use 255 to represent the lane field, 127 to represent the kerb field and 0 for the rest. The instance use different pixel value to represent different lane field and 0 for the rest.
All your training image will be scaled into the same scale according to the config file.
3.2 Train model
In my experiment the training epochs are 200000, batch size is 8, initialized learning rate is 0.0005 and decrease by multiply 0.1 every 100000 epochs. About training parameters you can check the config/global_config.py for details.
You can switch --net argument to change the base encoder stage. If you choose --net vgg then the vgg16 will be used as the base encoder stage and a pretrained parameters will be loaded and if you choose --net dense then the dense net will be used as the base encoder stage instead and no pretrained parameters will be loaded. And you can modified the training script to load your own pretrained parameters or you can implement your own base encoder stage.
You may call the following script to train your own model
python3 tools/train_lanenet.py --net vgg --dataset_dir data/training_data_example/
You can also continue the training process from the snapshot by
python3 tools/train_lanenet.py --net vgg --dataset_dir data/training_data_example/ --weights_path model/tusimple_lanenet/tusimple_lanenet_vgg_2019-03-26-17-16-13.ckpt-238000
4. Experiment
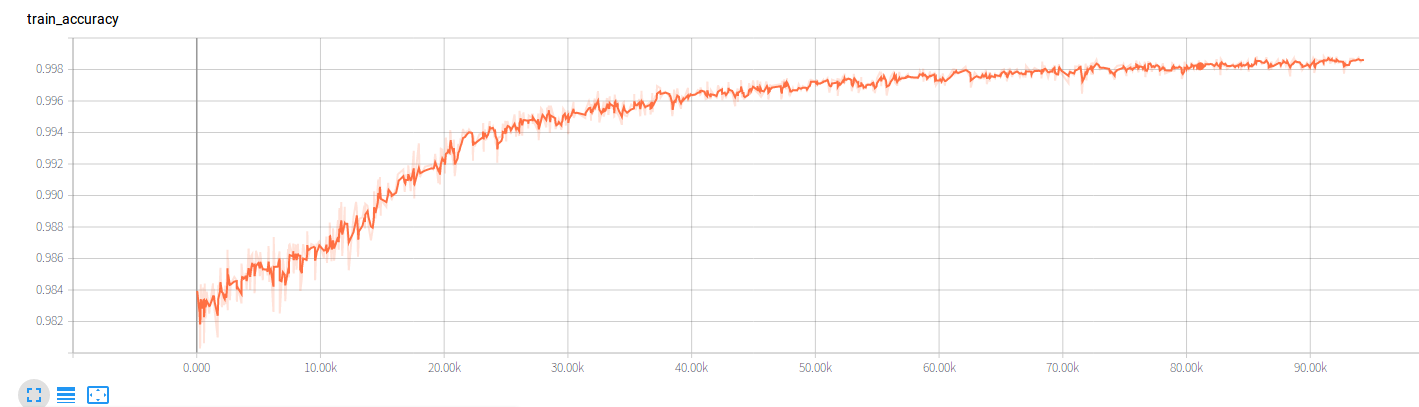
You may monitor the training process using tensorboard tools
tensorboard --logdir=tboard/tusimple_lanenet/vgg/
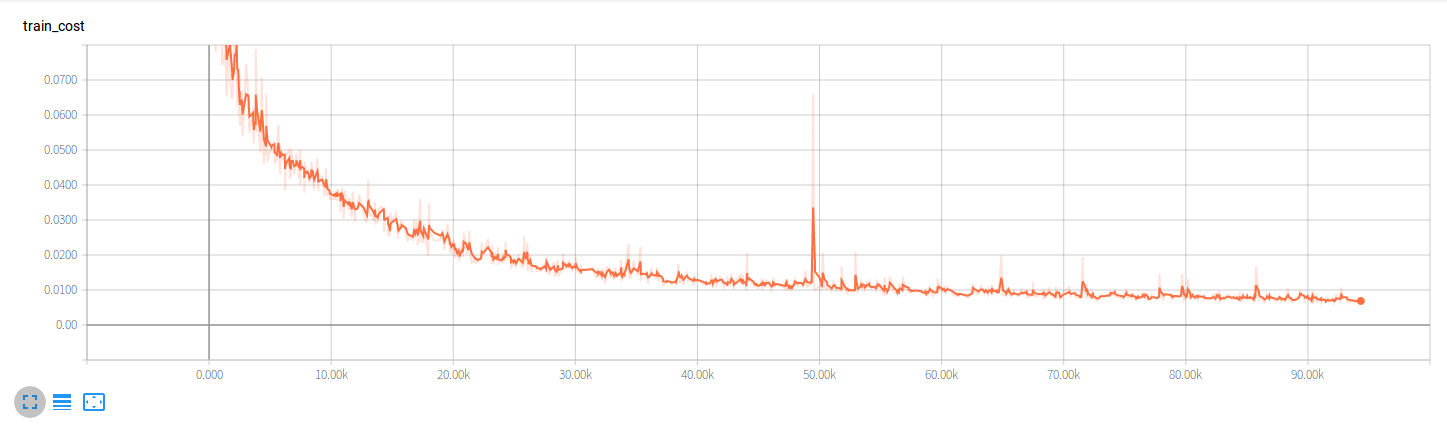
During my experiment the Total loss drops as follows:
The accuracy during training process rises as follows: